Cases
CASES
Categorization :
In recent years the automobile industry continues to maintain the momentum of rapid development, production and sales further growth. The customer unit is specialized in the production of automotive engine parts, in the production of automotive precision parts industry has more than 20 years of experience in the production of automotive turbocharger as the main production, automotive turbocharger is one of the important parts inside the engine, mainly driven by the coaxial impeller, through the high-speed rotation, to improve the efficiency of the engine's combustion power, turbo once there are imperfections, cracks or pinholes will lead to leakage of oil, oil consumption Once the turbine is defective, cracks or pinholes will lead to oil leakage, oil consumption will increase, and the bearing impeller will lose balance.

Therefore, we understand the customer's demand:
The clarity of industrial endoscopes is high, requiring no less than one million pixels.
Need to have customized naming and marking functions, because the use of the need to take a lot of photos and videos, shooting different locations and automatically record and edit the archives, such as the discovery of the missing part of the defects need to have a marking function, easy to trace back.
Second, the actual testing conditions:
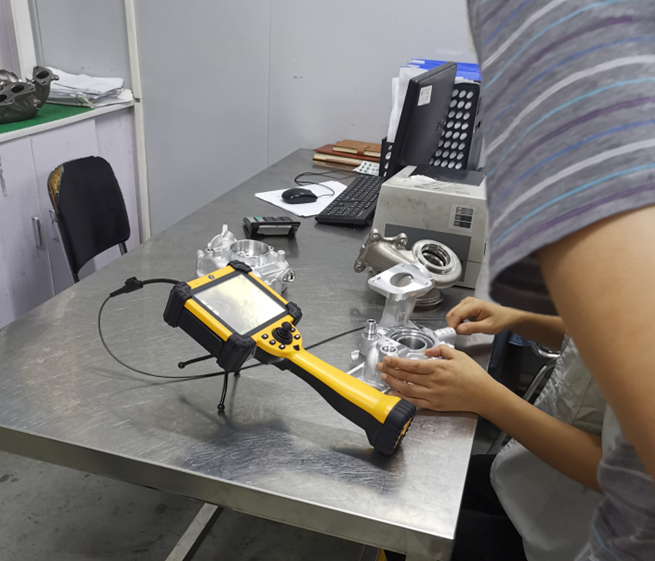
Customers mainly test automotive engine turbine parts, runner diameter of 3mm-5mm or so, the internal two curved channel, observation needs to be turned around to see the inner wall of the runner part, the runner wall inlet diameter of 6mm or so.
Third, the detection of difficulties:

Runners need to turn 360 ° to see the whole circle, and make the frequency is relatively high, the wear and tear on the front of the lens of the equipment will be relatively large, which will increase the cost and service life of the equipment.
Solution and selection:
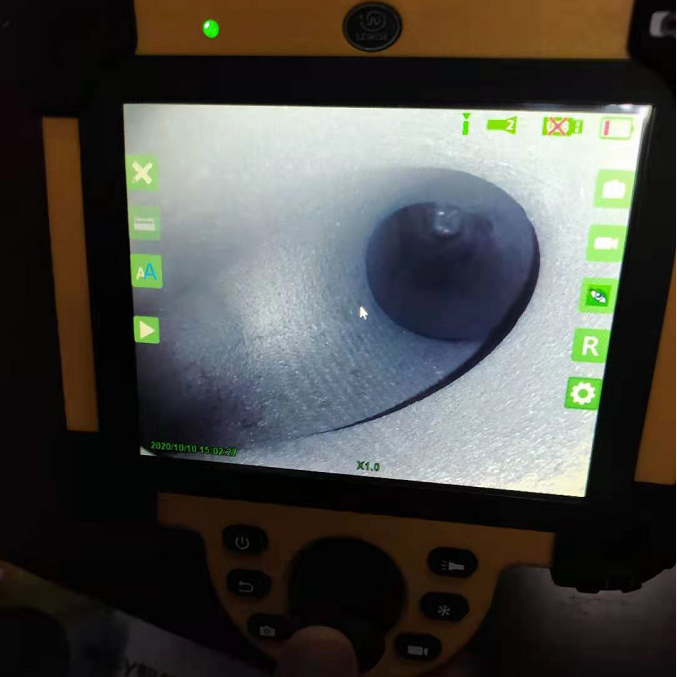
First, through the VSNDT industrial endoscope, 1 million high-definition pixels, can meet the AC internal 360 ° detection, can be intuitive and clear to determine whether the observation of the internal qualification, taking pictures and video archive pictures and videos are clear. Built-in 64G solid state hard disk to prevent data loss, while having 2 USB interfaces, VGA video output point-to-point.
Second, the recommended selection of diameter 2.8mm endoscope, detecting defects inside the runner, endoscope inserted into the cavity can realize 360 degrees real-time guidance, comes with built-in lighting source, the inspector through the LCD monitor to observe the internal image, in the case of not needing to disassemble and destroy the interior of the cavity, through the industrial endoscopy can be observed inside the cavity of the situation, and can be problematic defective parts of the photo or video. .
Third, due to the inner wall back and forth detection will appear friction lens life, our company used a thickened alloy lens cover, in order to reduce the degree of wear and tear of the lens to increase the service life, the customer is more demanding on the quality of their products, in order to ensure that the product process and the market demand for the supply of strict control of the quality, then through our endoscopic equipment can be clearly see the inside, the customer is more satisfied with our products, but also for the customer to Solve the related problems.

Factory : Building 19, No. 10, Songshanhu Park, Dongguan, Guangdong
Office : 18F, Pingshanshouzuo, Pingshan District, Shenzhen,Guangdong
E-Mail:jessicamo1106@gmail.com